Merging Scans: The Basics of 3D Scanning
The world of 3D scanning is also indispensable for reverse engineering. In other posts we have therefore already dealt with many topics relating to 3D scanners or dealing with target marks. In this article we would like to point out another problem around the topic of 3D this time. And, of course, provide a remedy at the same time. We'll go into the basics of 3D scanning further in this article. The Mako-Technics team is now working on merging scans.
The problem with the surface
When scanning a stationary object without target marks, it is often impossible to capture the underside. To put it simply, you cannot depict the entire surface. In this case, our engineers recommend that you run multiple scans of the same part. And then merge the individual scans. In the following, we will present you a software solution that will help you do this effortlessly. We will guide you step by step through the VXelements program. Benefit from our know-how. Mako-Technics- your expert for reverse engineering.
VXelements
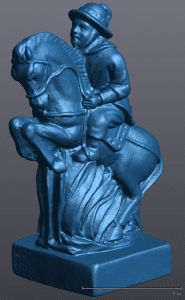
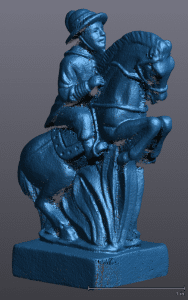
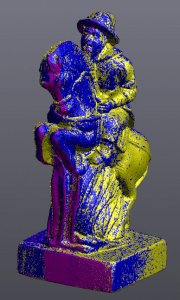
Problems are our specialty. Because our experts are very familiar with finding solutions. Of course we also have one at this point. Mako-Technics recommends the aptly named "Merge Scans" tool from VXScan. With this you can do just that: merge several 3D scans. We have also prepared an example for this. We take a look at the 3D scan of a rider chess piece. In the picture above you can see the cleaned and finished scan of the figure. This is only a few centimeters tall. And yet full of details.
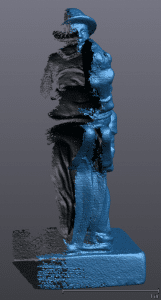
Finding targets for such a small component will be difficult. Even if you did find some, too many details would still be covered. Details you need to capture. If your component were wonderfully symmetrical, you could just scan half of it. You would then simply mirror them. However, a chess piece in the form of a knight has an asymmetrical and complex geometry. Means: You have to get a little creative with your scan.
Different positions when scanning
Even if it might sound too easy. The solution is as simple as it is simple. You scan the figure in three different positions. Once upright, once lying on the right side and once lying on the left side. Exactly as you see it in the picture below.
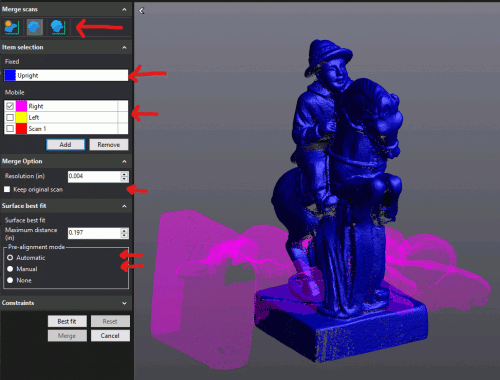
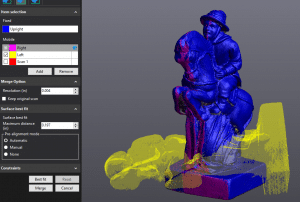
This is where VXScan comes in. With his tool you can now easily merge these different scans. When you start the program, you will see the toolbar on the left. Above are the alignment options (targets, best surface fit, and global registration).
The easiest function for us to use was "best surface customization". You can also use these without any problems.
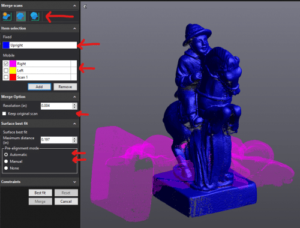
Marked with the color blue you can see the fixed network in the element selection. This is the active scan. The mobile network is also displayed to you. It can be selected from one of the other networks. In our case the right side of the knight marked with pink. You can keep the original (fixed) scan or you can have this scan merged and overwrite the final resolution. And carry out the pre-alignment. The automatic function works without problems in most cases.
Merging scans: Mako-Technics is your ideal partner
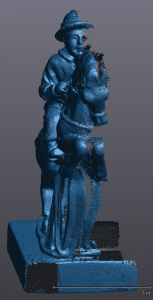
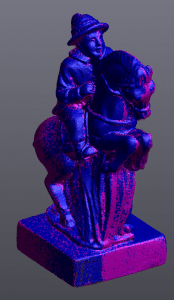
When you have now achieved the ideal fit below, the preview shows you the expected result of the merge. Now select "Merge". The software then combines all of the 3D scans to create a new mesh. You now have a combined scan. This contains the best of the previous scans. Do not forget:
You still have to finalize and clean up the network in VXModel.
The Mako-Technics team hopes to have brought you closer to merging scans. If you have any questions, please do not hesitate to contact us. Simply use our contact form for this. Compliance with German quality standards is a top priority for our engineers. Use our experience and make your project a success. We are looking forward to your message.


